what i'm doing here is a pcb for the sharc 21065 dsp (0,5 pitch) ... in all 0,2 mm track 0,5 mm drill plate to plate connections...
the pcb before exposure...
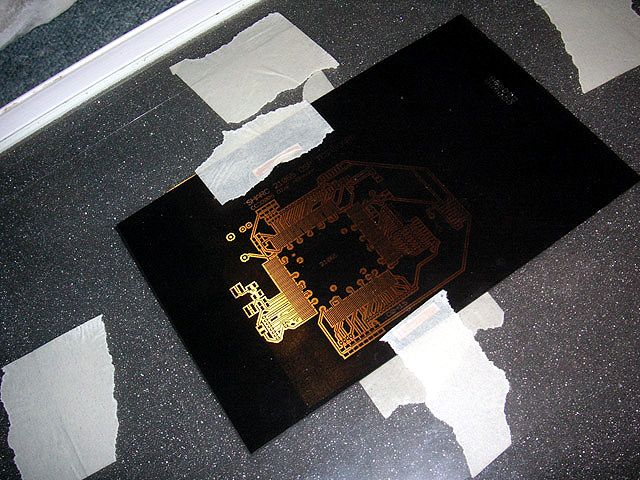
i'm using a laser printer to print out my layouts... you can do almost perfect pcbs with a laserprinter... i often read in forums only use that epson c64 or was it c65 printer (dunno)... bla... i guess that ppl are doing something wrong... important is a good uv light ( i used uv light bulbs... when you want to do serious pcbs forget this )...,the right exposure time and strength of the developer... i mean i can do 0,15 mm tracks here at home with a laserprinter...
i'm using a face tanner (you can get them on ebay for less money) to expose the pcb sides... this is just perfect...
i'm exposeing each side only 90 seconds !... in general... it's better to expose less than much too long...
as i said the developer is also important... i'm using a not very strong developer mixture... a too strong developer kicks your small tracks away...
and do not use cheap pcbs... when you use cheap ones that plastic you pull off sometimes destroys pcb before exposure/development and your small tracks are gone...
sometime i've read in some forums... tips like use your finger during development to wipe away the developed stuff... don't do this... do not touch the pcb at this time before and after...with small tracks you risk small cuts on your tracks... only shake your pcb in the developer a bit .. when you do double sided pcbs turn it after some secs... and turn and so on...
the pcb after development...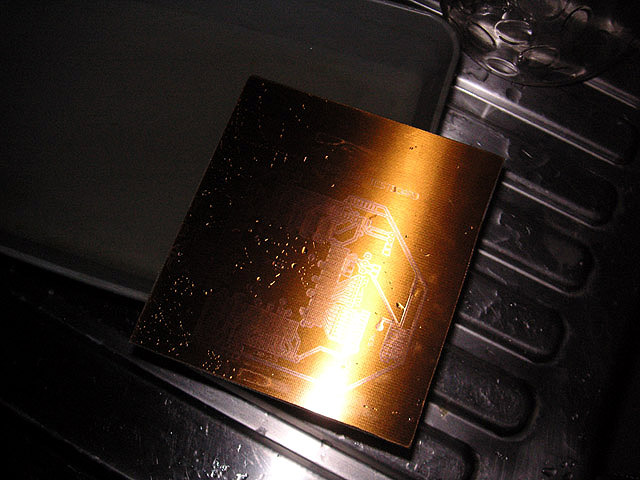
it's important that you can see the pure copper after the development... due to the very small track /pad width it sometimes hard to see if it was really fully developed... to avoid this... i put the pcb for maybe 10 seconds into the acid... after this time you can see where the pcb is not fully developed... if you still try to etch this...forget it... your small tracks are gone before your not fully developed parts are away... so if there are parts which aren't developed fullly (you can regonise that -> copper color)... just clean the pcb with water and then put it back into the developer for a while... that works great...
the pcb during etching... 
to get good results the acid should have the right temperature... 42-45 degree is good... you should not put in the pcb before... the etching time should be as small as possible... otherwise you your small tracks are gone ;)
as you can see i have a etching machine... i bought one some time ago... but i wouldn't buy one again... better and even cheaper to build it for your own...
the pcb after etching...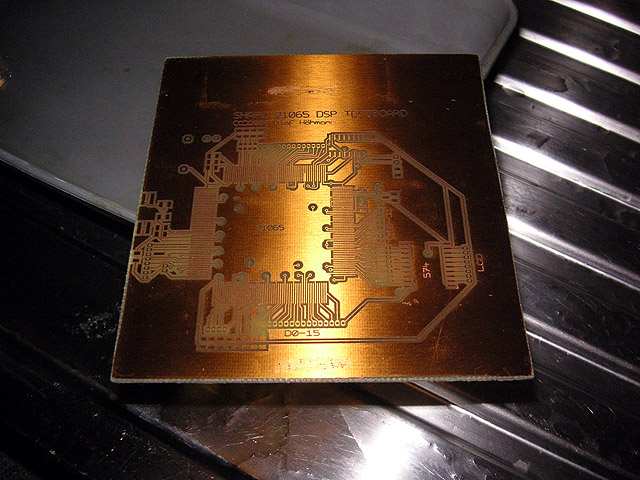
when you plan to tin-plate your pcb... the best way to do this is to expose both sides 5 or 10 minutes with the face tanner... after it put it into the developer again (a bit longer than normal)... that's much better than cleaning it with acetone only... (just try it you will see the difference) after the developer clean it with acetone...
the pcb after tin-plate...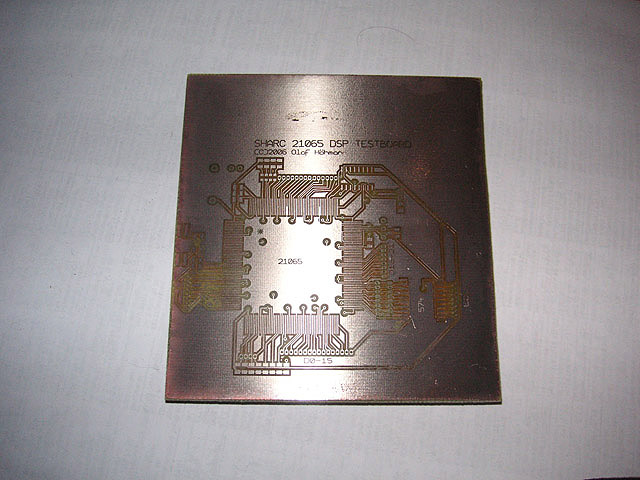
the chemical for tin-plate wasn't very fresh.. hm anyway didn't tin-plate all...
a big problem was always how to do the plate to plate connections (ptpc)... and ! how to do ptpc under an ic ?... really tried out much... also solutions from bungard...
that's all... hm let's say ... not working very good...forget it...
to be honest in the end i'm using just a wire from a cord... this works just perfect... means i open up a cord... and i just pick one wire from it... then i just sewing though all place to plate connections... like this....
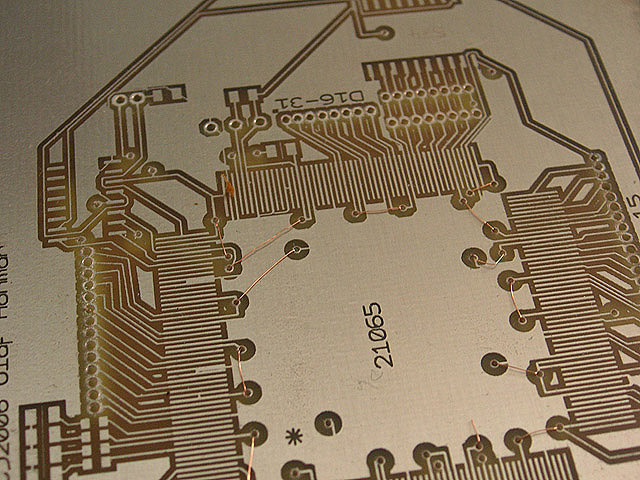
that works really good... the goal was to have all power supply connections under the sharc dsp... to have all other pins free for routing....
in the end it looks like this...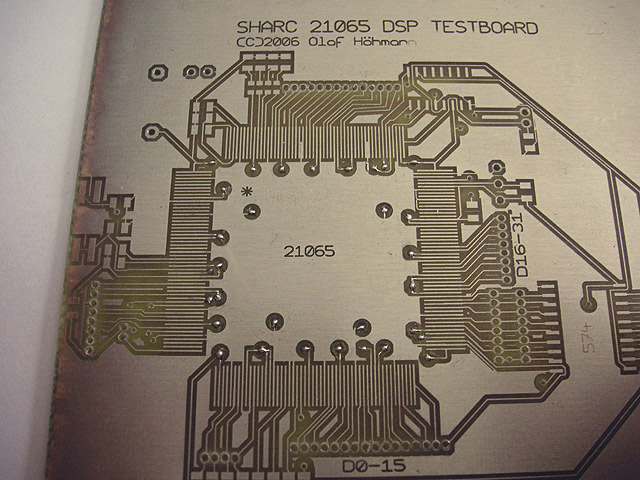
the height of the ptpc soldering points are small enough (so far you can solder a bit ;) ) to do a ptpc under every ic...
the almost finished pcb...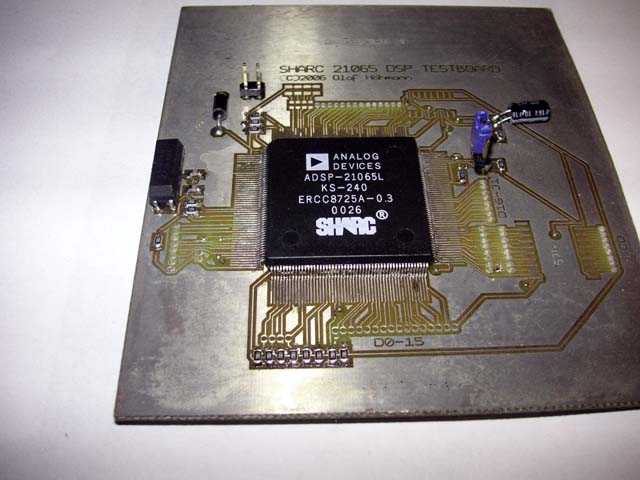
now you maybe ask yourself how did he solder the sharc dsp ? or the other smd parts... did he use a reflow oven ? or hot air ...
no... you don't need this...
soldering smd resistors or capasitors:
resistors or capasitors you just tin-plate one pad of all smd parts (with very little tin) ... then you place your smd part you want to solder with a tweezers... solder the side you pre tin plated before to fix the part (no tin is needed because of your pre tin)... and do this for all others smd parts... in the end you solder all pads with tin...
soldering 0,5 pitch ics like the sharc dsp:
you can solder this kind of ics with 0,5 mm pitch in 10 minutes without soldering each pin individually...
how does this work ?... i found many tips how to solder this... this is my way first of all... don't use the normal soldering flux you can get everywhere... use fluxi 88 ! the advantage is... fluxi is allmost liquid... you will see when you use it... and the result is much cleaner... so first pre tin plate all your ic pads... with >very< little tin...really just a little... ! then place your ic... when you found the right position... fix it with two soldering points diagonal... then check the pins with a magnifier if they fit correclty to the pads... if not use a nail to shift them into the right postion... if all is ok so far... use flux 88 on the side you want to solder... some guy in forums say... solder the side with much of tin...and then remove it with desoldering wick... hm don't do this... this is a real pain in the ass... just spread much of flux 88 on the pads you want to solder (ok not too much ;)) ... then clean your iron with a kleenex ... then give really a bit of tin on it... then you just drive through the pins with the iron... important! only touch the ic pins at the lower side not at the upper side... for example the sharc has long pins it's hard to remove shortcuts on the upperside... the trick is not to use too much tin during sodering...better use less then too much... if it's too less redo that part with little tin and fluxi 88... of course sometimes it will happen two pins are shortcutted (if you will use very less tin...you will have maybe two or three shortcuts per side)... if so... use fluxi 88 at this point... always clean your iron with a kleenex (that's important...) with a clean iron the tin is leeched to the iron and your shortcut is gone... during removing move the iron away from the ic... with a little pratise this is not a nightmare to solder 0,5 smd parts... it's just fun ;)
be careful do not touch the pins too hard... the 0,5 mm pins trend to deform... better is not or only to touch them a bit... good is a smooth and small sinus movement of the iron thought the pins..
finally you have check your soldering with a magnifier... if all is connected correctly